1 Circular Needle
Let’s talk about working a tubular piece of knitting on a single circular needle. You will often hear this technique referred to as knitting in the round. This is an alternative to using 2 straight needles and having to sew a seam, or to using double pointed needles. Some of the benefits of using a single circular needle for round knitting are that you do not have to worry about misplacing one of your needles, you have fewer needle tips to keep track of, no seam to sew, and it is easier to handle a larger tube of knitting such as a sleeve, hat or body of a garment. Always use a circular needle with a length less than the circumference of the item you are knitting. If your hat will be 18 inches around when finished, use a 16 inch long needle. The reason for this is that the stitches need to fit comfortably around the needle and meet at the tips without stretching. Using a needle that is too large can result in misshapen fabric.
Note: We have already cast on our stitches and are ready to knit. If you need instruction on how to cast on, please check out our Casting On category.
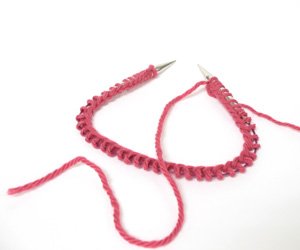
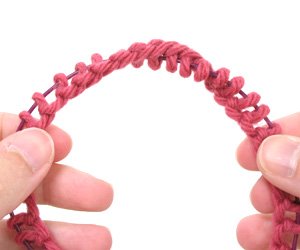
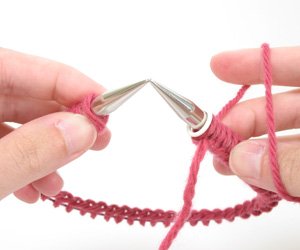
 Push the last of your cast on stitches to the tip of the needle so that the working yarn is close to the tip. Hold this needle tip in your right hand. Pick up the other needle tip with your left hand. Slide the stitches to the end of the needle tip now in your left hand. Before you knit your first stitch, ensure that there is no twist in the cast on stitches. The cast on edge should run along the bottom of the needle all the way around without looping over the cable.
 An unwanted twist would find the cast on edge wrapping all the way around the cable. This would cause your knitted piece of fabric to become somewhat of a figure eight. Twisting is a problem that cannot be corrected later — you would have to tear out all of your work and start over.
 Place a marker on the right needle tip before you begin knitting. This will allow you to keep track of the beginning of the round for counting purposes. Begin knitting by inserting the right needle tip into the first stitch on the left needle tip. Using the working yarn, knit the first stitch and pull tightly so that it comes together snugly with the stitches on the right needle tip. Take care not to knit with the cast-on tail! You always want to be knitting with the working yarn that comes from the skein.
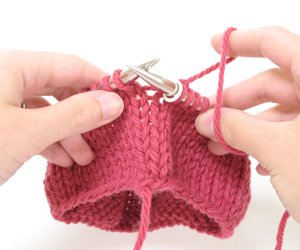
 Keep knitting until you have come back around to the marker. Every time you reach the marker you have completed one round of knitting. Now you can just continue to knit and you will produce a beautiful tube of stockinette fabric without having to do a single purl stitch!
When knitting in the round, you are always working on the “right side” of the fabric. In the event that you are reading from a charted pattern, you will now read each and every row from right to left and all stitches will be knit as for the “right side” of the fabric. For instance: if a stitch says “knit on right side, purl on wrong side”, you will now be knitting that stitch every time you come to it.
Please see the Chart Reading Tutorial or watch our video tutorial on How to Read Lace Charts for more information about charts. If you are converting a pattern from flat knitting to circular, you must be aware of the fact that the “wrong side” rows will all need to be changed. For instance: stockinette stitch fabric is created in flat knitting by alternating knit rows with purl rows. When knitting in the round, you must knit every round to create stockinette stitch since you are never turning your work.

