

A welt is a raised tube of material that is worked into a knitted piece. It runs along a line of stitches and resembles an I-Cord. It can be narrow, wide, be worked in knit or purl stitches, colors, or any combination of the above. It can be used as a design or structural element, and even used as a drawstring or piping casing. It requires an extra set of double point or circular needles that are smaller than your working needles.
For this demonstration, we’ll do a stockinette welt; the welt as well as the surrounding fabric is stockinette stitch.
Work up to the point at which you’d like to place your welt. Run a lifeline through that row of stitches, or use split-ring markers to mark the row.
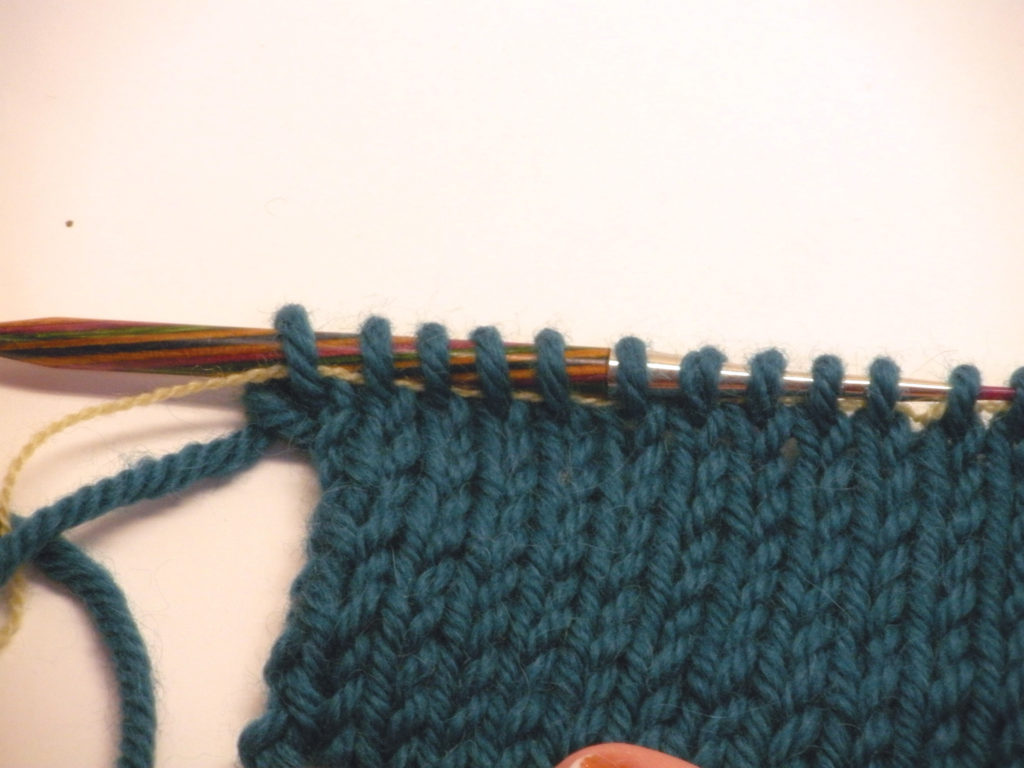
Decide how big you want the welt. It can be small, only a few rows, or even big enough to fit an arm through. Most welts would be between 4-10 rows; if worked flat, stop after having worked a WS row.
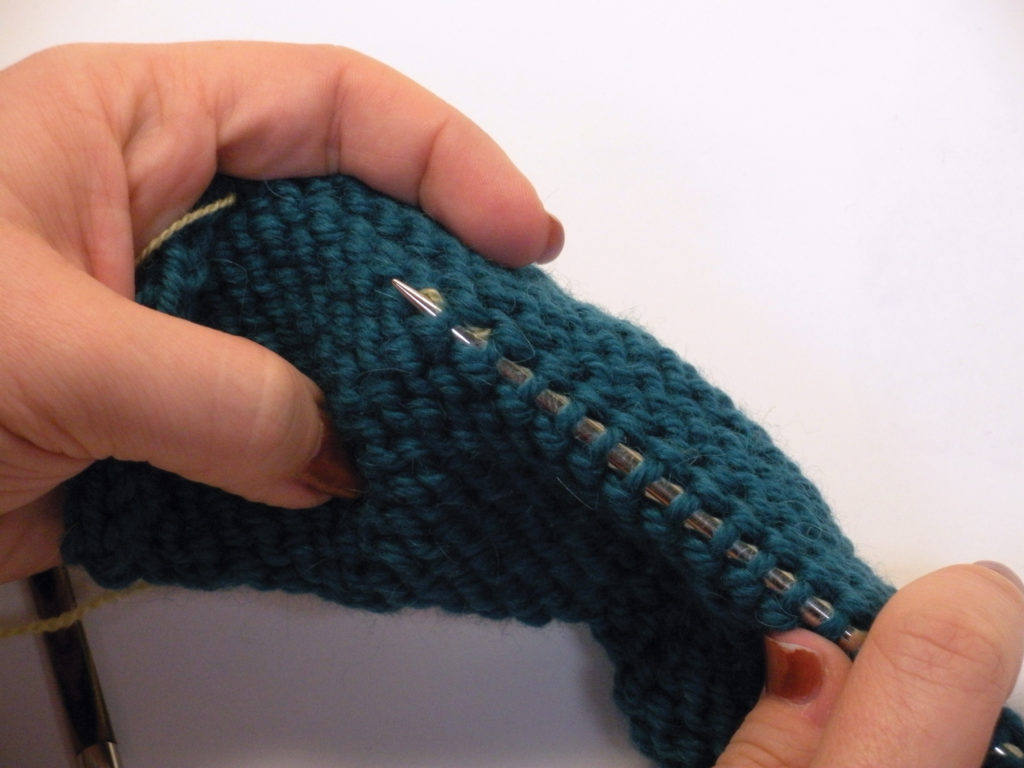
Work as many rows as you wish, doubling the welt portion over to meet the marked row to check size. When you have reached your desired length, with WS facing, use a spare needle to pick up every stitch in the marked row.
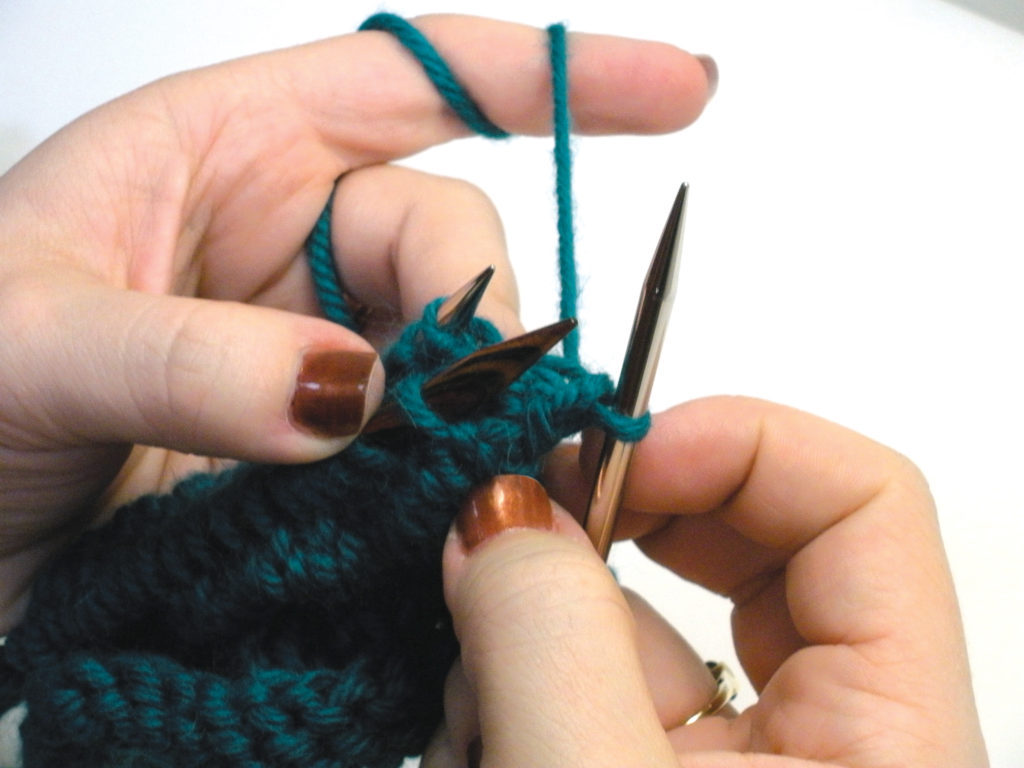
Turn to the RS. Hold both working needle and picked up stitches together with working row in front (the welt will fold down below the needles), knit the first stitch from the front needle together with the first stitch on the back needle. Work across the row in this manner.
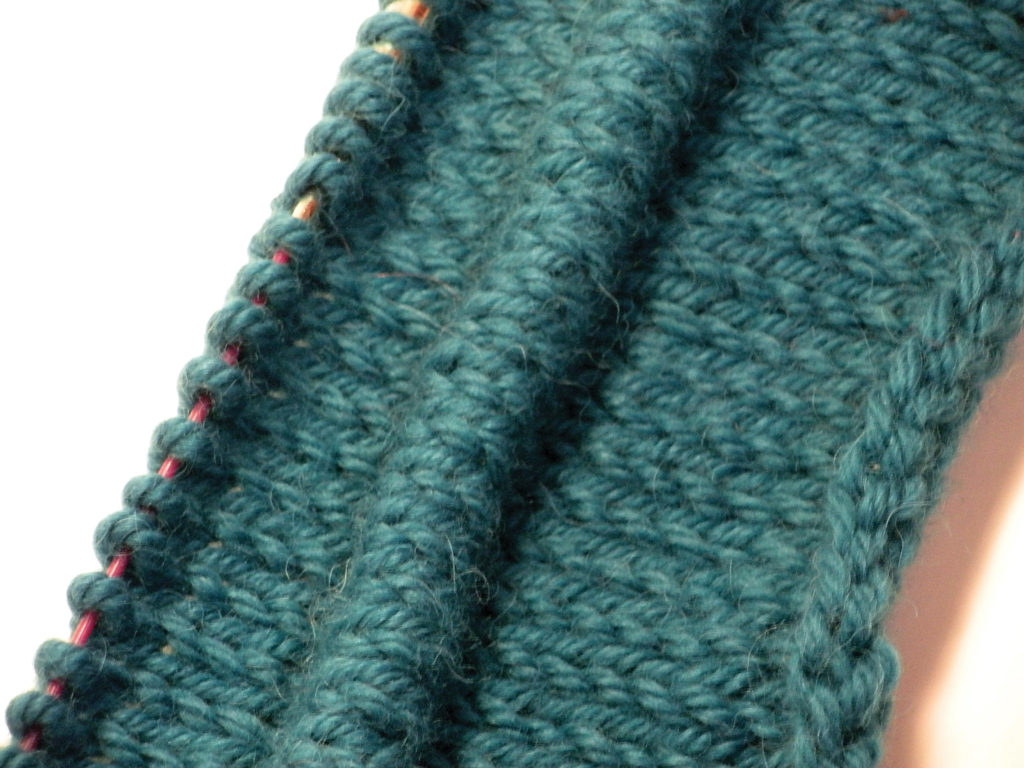
Continue working as you were before the welt.
If you are working a drawstring: on a RS row in the center row of the welt, work to the point at which you want one drawstring end to come out. YO, K2tog. Continue to the opposite point, where you want the other end to come out, SSK, YO. For larger holes, work at both ends as SSK, (YO) twice, K2tog. Place the drawstring in the welt as you are working across the finishing row.